A patient with a history of bioprosthetic mitral valve replacement developed a paravalvular leak (PVL), allowing blood to flow around, rather than through, the implanted valve. A transcatheter plug was placed to seal the leak, but a residual gap remained along the medial margin of the prosthetic valve. With the leak still present, additional intervention was needed; but determining the right approach was complicated by artifacts on the echocardiogram caused by the existing hardware.
The involved interventional cardiologist reached out to the 3DQ Lab to better understand the anatomy and evaluate options for repair. The key question was whether the leak could be accessed through the blood vessels via a catheter-based approach, or if the patient would require open heart surgery, which carries significantly greater risks. To support this decision-making process, the team requested a new CT scan and a 3D printed model of the patient’s heart, with focus on the mitral valve, the leak site, and surrounding implants.
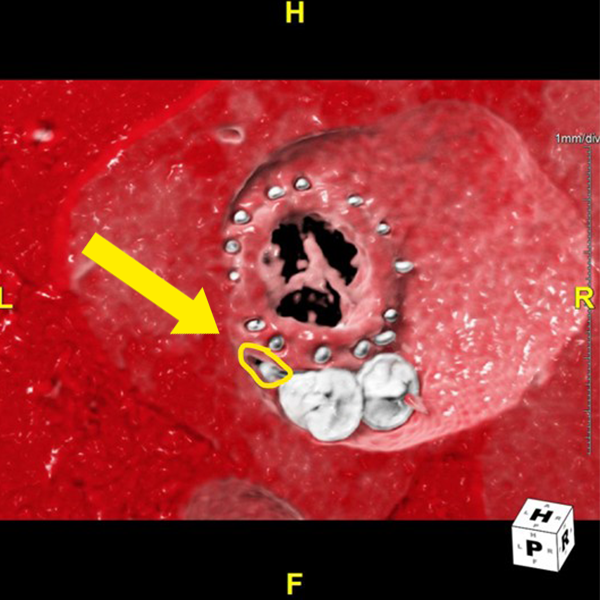
Figure A (Right): A volume rendering of the mitral valve, mitral plug, and leak requested for 3D printing. Learn more about volume rendering here.
New CT imaging data was obtained and used to segment and isolate key anatomical structures, each assigned to its own digital mask to allow for color differentiation during printing. The segmented structures included the mitral valve prosthesis, the transcatheter plug, the residual paravalvular gap (the leak), the aortic valve, and surrounding cardiac anatomy such as the left atrium and left ventricle. The aortic valve was included in the model because it may serve as a potential access route for treating the mitral valve leak. Using specialized 3D editing software, the 3DQ team created a detailed digital model with careful attention to the spatial relationships between the implants and native anatomy.
At the cardiologist’s request, the model was also designed to be modular—sections of the left atrium and ventricle could be removed to provide a clearer view of the valve and leak. This design preserved the overall anatomical context while allowing targeted evaluation of the area in question.
Figure B (Right): Interactive 3D model of the proposed print. The left atria is presented in transparent grey, the left ventricle is opaque grey, the mitral valve is yellow, the mitral plug is green, and the aortic valve is red.
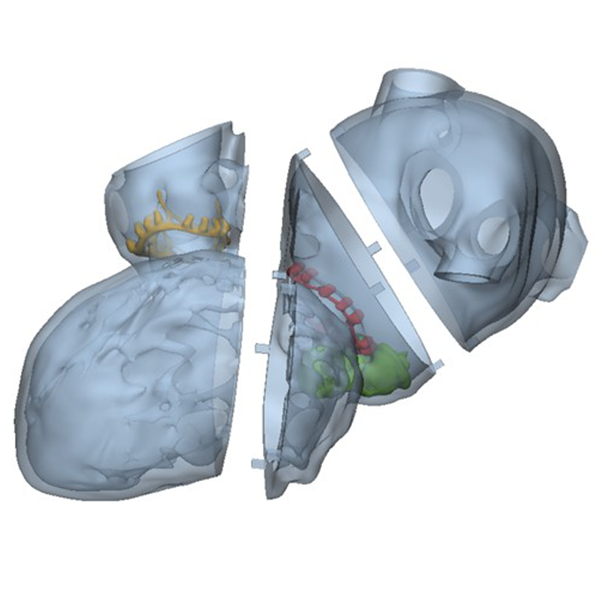
Figure C: A side view of the proposed 3D print, showing the modular design with square pegs used to align and hold the sections together.
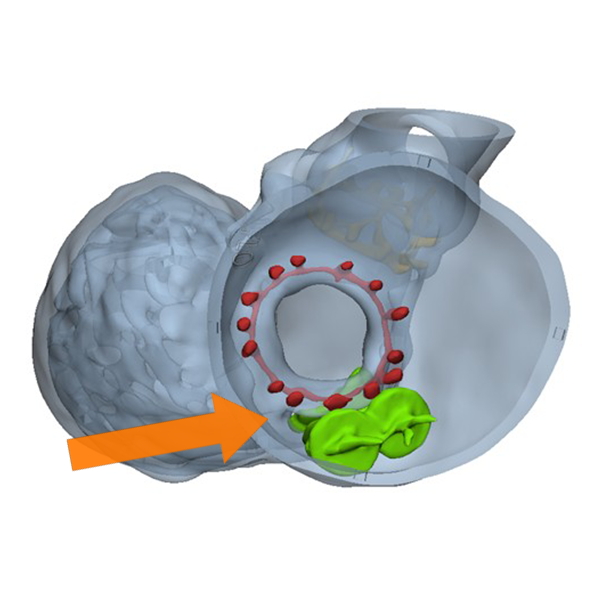
Figure D: A close-up view of the paravalvular leak, used to confirm its size and location before proceeding with 3D printing.
Once the segmentation was approved by the cardiologist, the model was printed using a PolyJet printer. A clear resin was used for the heart structures to maintain visibility, while the valve and plug were printed in contrasting colors to make them easily identifiable. The resulting true-to-size model allowed the cardiologist to examine the implant positions, assess the remaining leak, and explore potential approaches before returning to the operating room. The model proved to be a success in that the cardiologist felt confident they would be able to safely plug the hole using a catheter-based procedure through the blood vessels rather than open heart surgery.
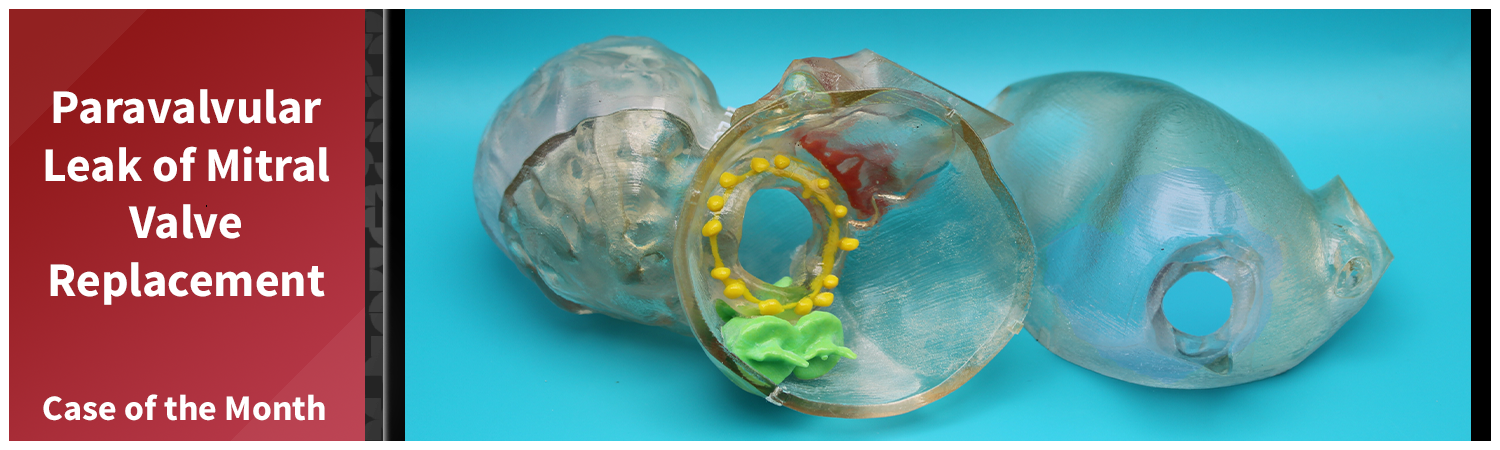
Figure E (Right): The completed 3D print, fully assembled.
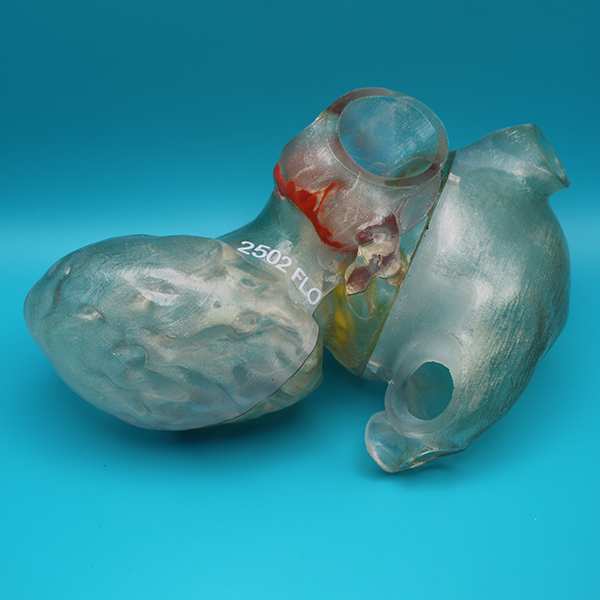
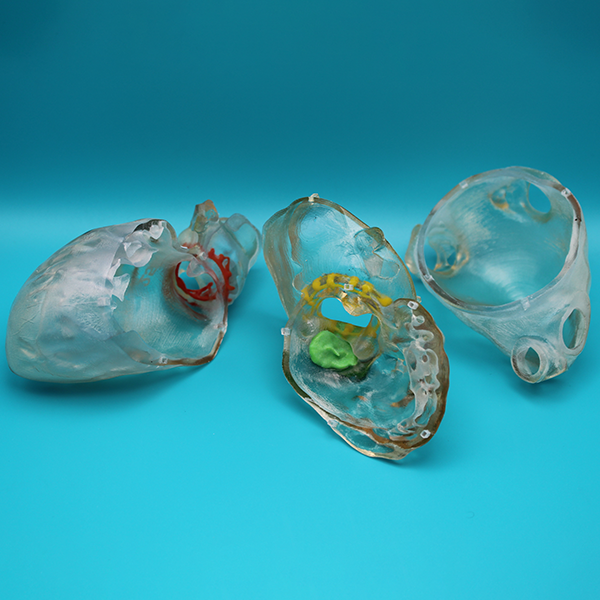
Figure F: The completed 3D print, disassembled into its three pieces.
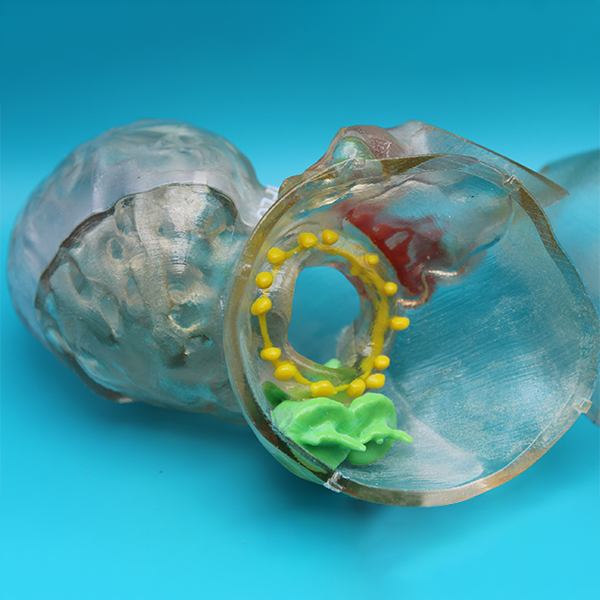
Figure G: The completed 3D print, focusing on the mitral valve, mitral plug, and region of the paravalvular leak.

